Enrolment Dashboard > Attendance Tile > Attendance Icon
This screen will allow you to mark your attendance for enrolment. You can also send an email and SMS to the student’s enrolment and view the marked attendance list.
Tiles on the Attendance Listing Screen and their explanation:
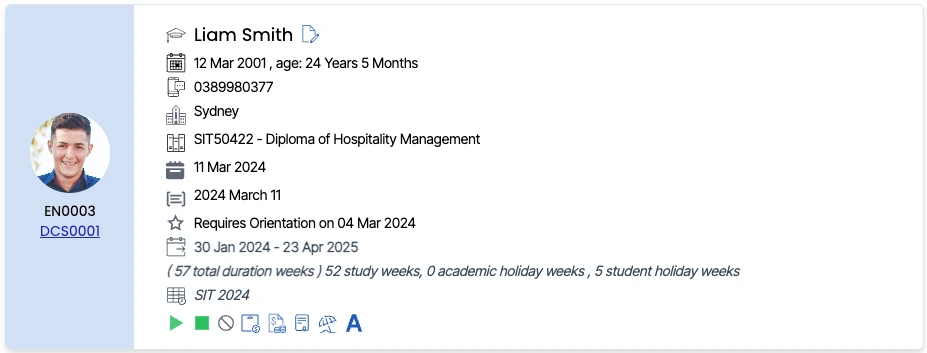
This tile will show you the basic details of the enrolment, and all the icons in this tile are read-only. Please note: This screen will not allow you to make any changes to the profile tile
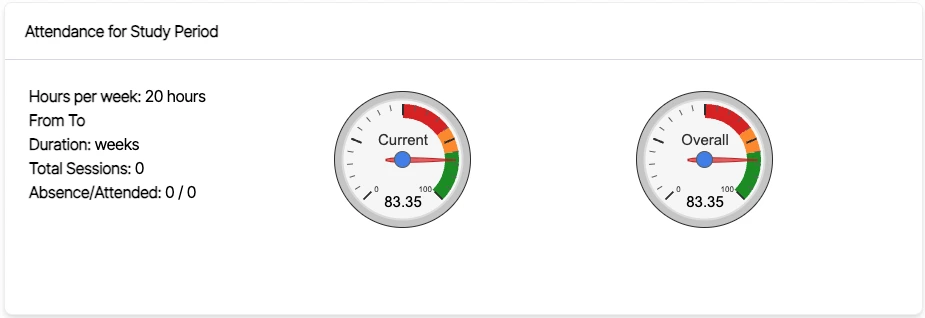
This tile will show you the current study period of enrolment with Hours per week, start and end dates, duration in weeks, total sessions, and marked attendance. It will also show you the current and overall attendance percentage.

This tile will show you a drop-down where the current study period will be selected by default. If you need to mark attendance for the past classes, then you can choose the study period as per your requirements. Also, you can send an email and SMS to the student from this tile. You need to select the study period to mark the student’s attendance.
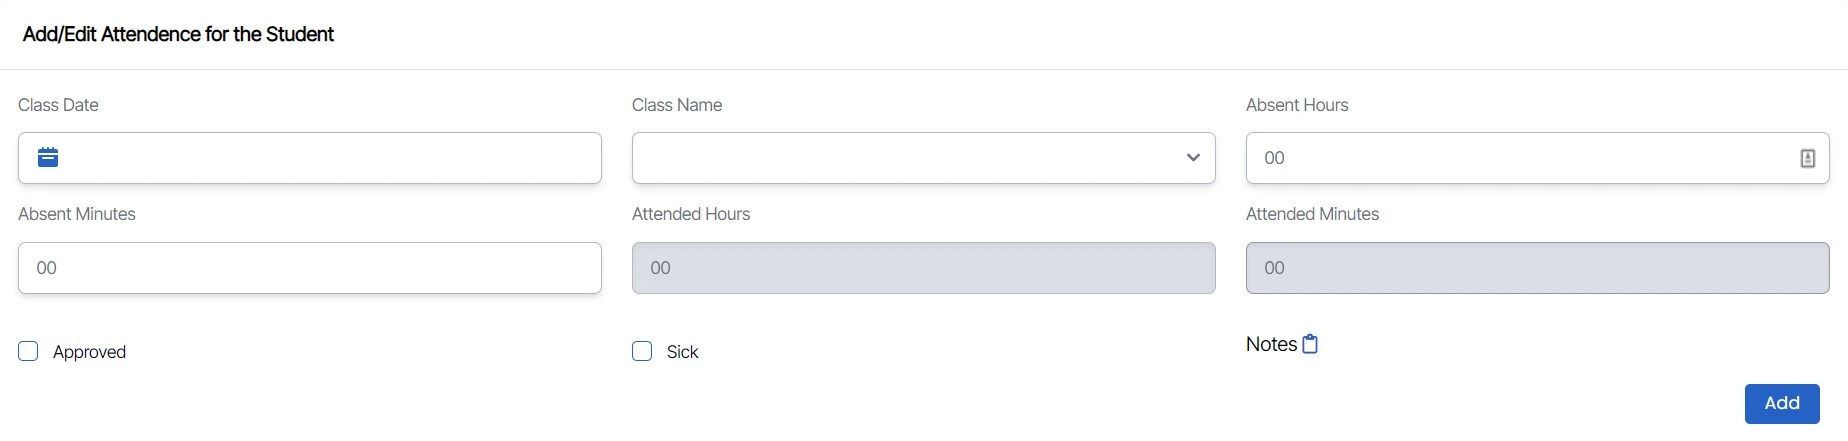
This tile will allow you to mark the attendance for enrolment with the selected class date and class name as shown below.
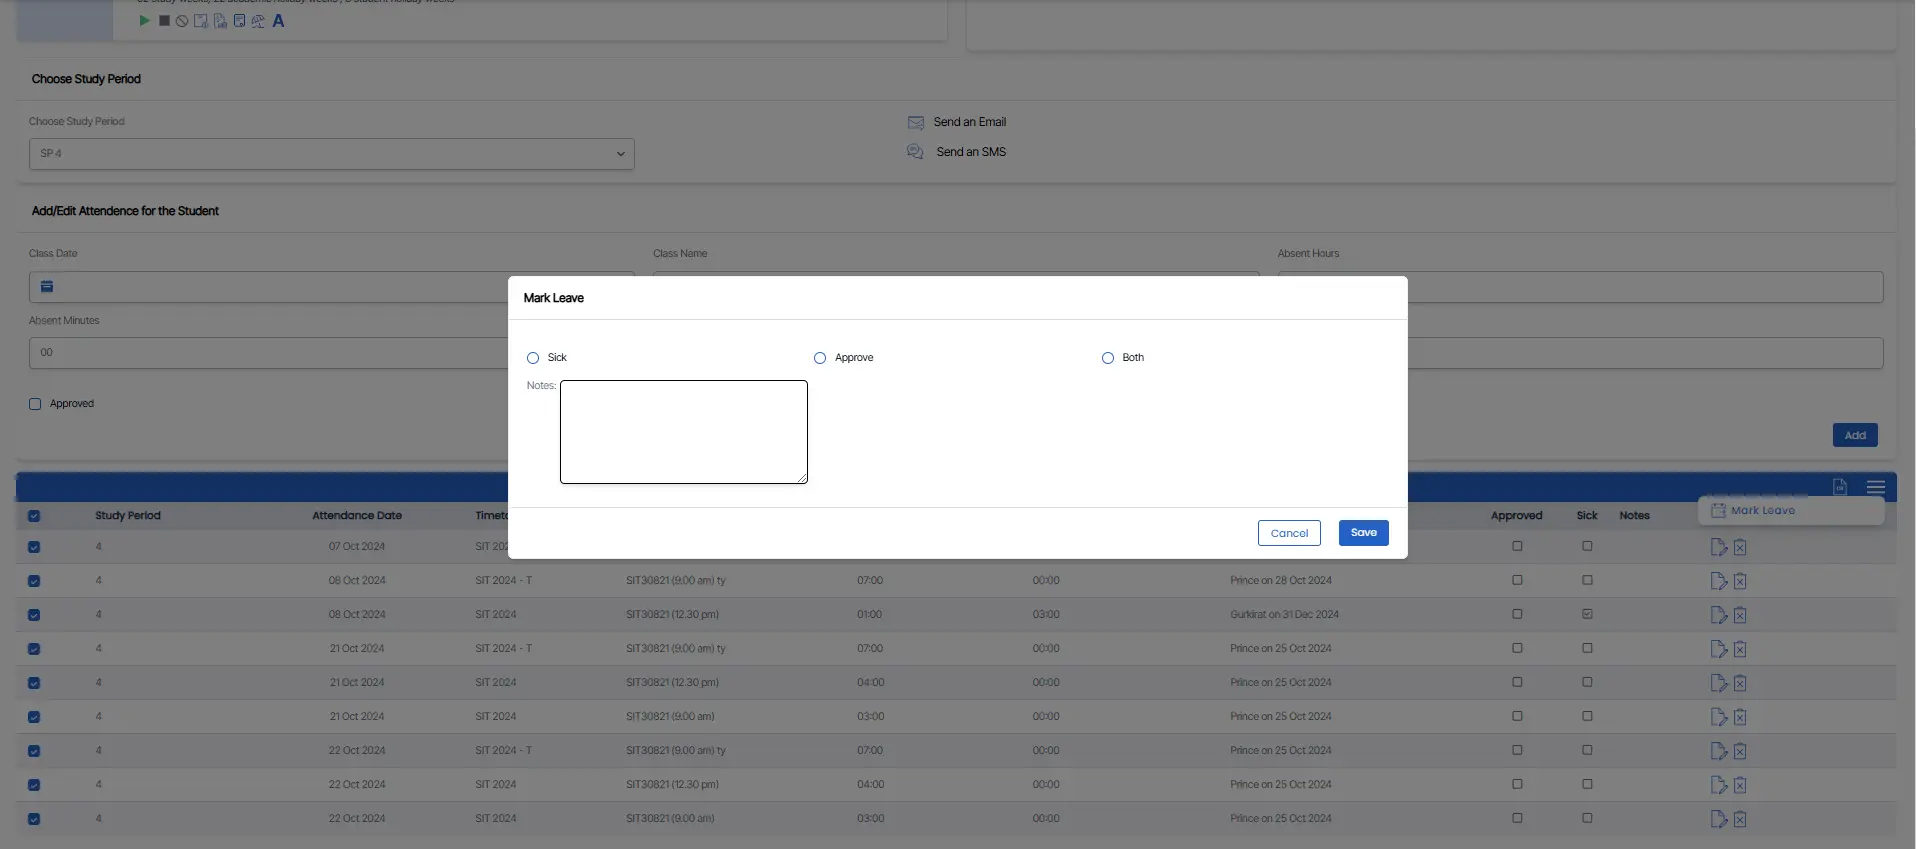
On this screen, select an attendance and then click on the burger menu. After that, click on ” Mark Leave”.
A pop-up screen will appear with new radio buttons, such as:
- Sick: Mark all selected leaves as sick.
- Approve: Mark all selected leaves as approved.
- Both: Marks all selected leaves as both sick and approved.
Users can also mark sick leave or approve leave in bulk for existing attendance. The attendance records will be updated based on the selected button.
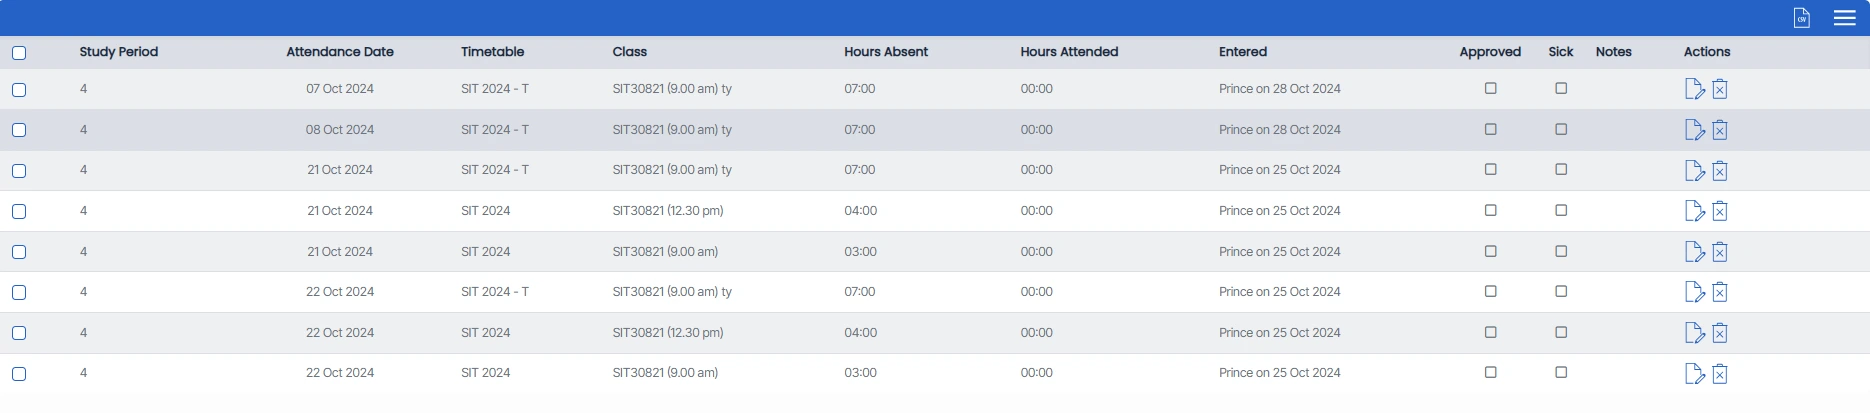
Notes Column:
Additionally, a new column for notes has also been added. Users can easily update notes for attendance with a single click.
| Fields | Explanations |
|---|---|
| Class Date | Select the date of the class using the calendar icon. This determines which class records will appear. |
| Class Name | Once a date is selected, the system will display all classes linked to the enrolment for that date. |
| Absent Hours | Number of hours the student was absent. |
| Absent Minutes | Number of minutes the student was absent. This allows you to record partial absences accurately. |
| Attended Hours | A read-only field. The system will automatically calculate the attended hours based on the absent hours entered. |
| Attended Minutes | A read-only field. The system will automatically calculate the attended minutes based on the absent minutes entered. |