Academics > Campus
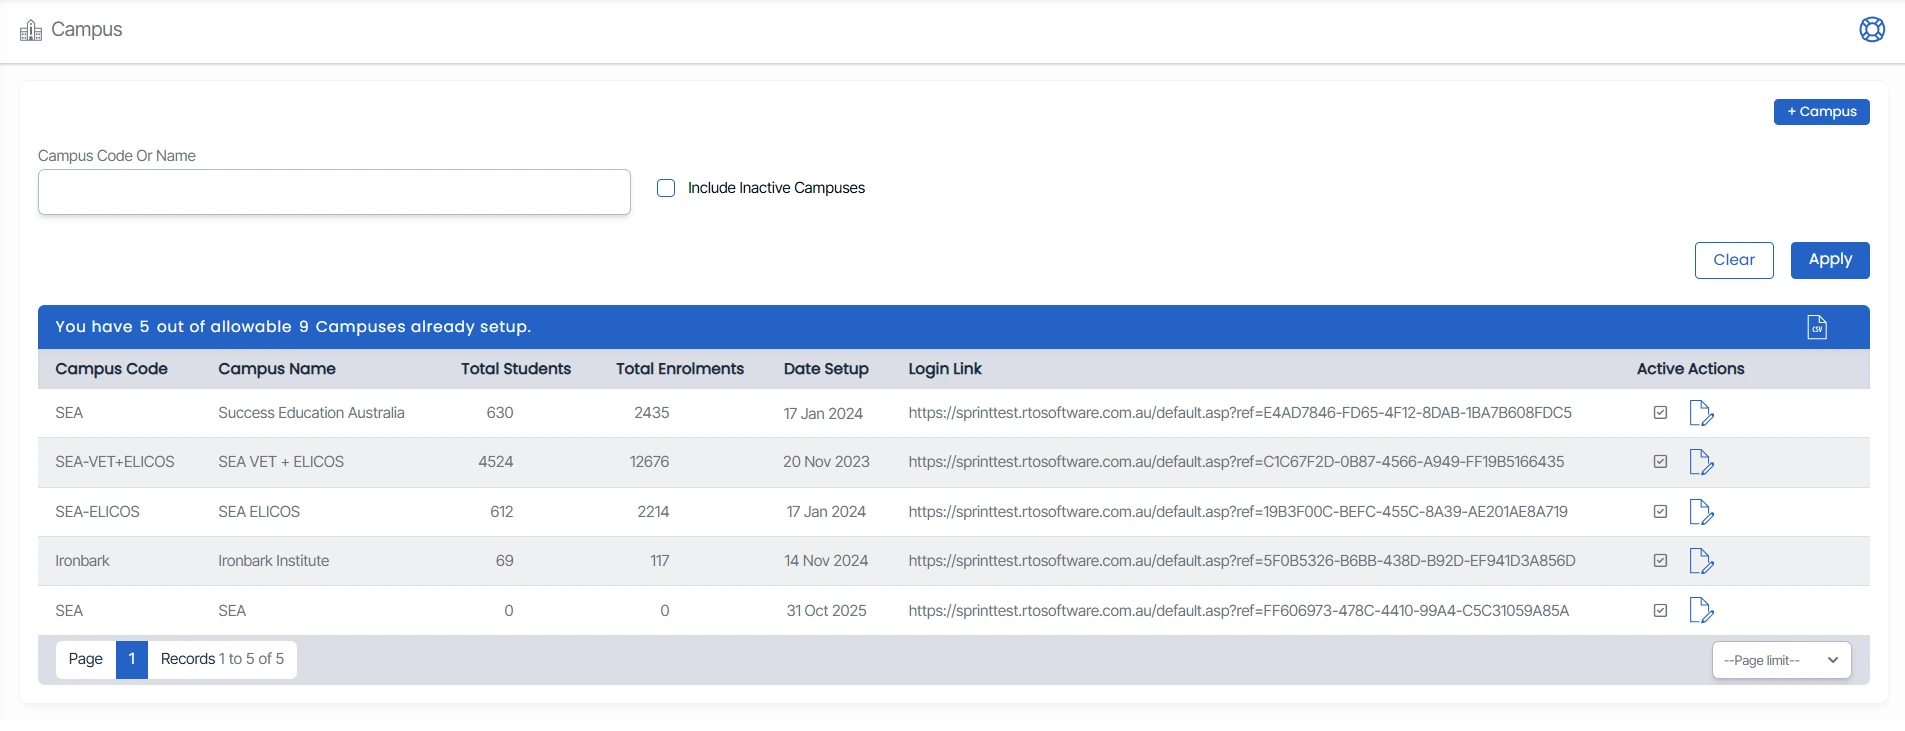
The Campus screen displays the total number of campuses available under your site licence. You can search for a specific campus using its code or name, and if required, include inactive campuses by selecting the Include Inactive Campuses option and clicking Apply. This is particularly useful when you need to view or manage both active and inactive campuses. It displays only the campuses you are authorised to access, based on the permissions set in the User Entry Screen. This ensures users can only enter the campuses they are approved to manage.
If you have access to multiple campuses, TEAMS will show those options on the login screen. Simply select the campus you want to enter before proceeding.
From the Campus Welcome Screen, you can also Share Campus Login Links. When a user logs in using a campus-specific link, TEAMS stores the selected campus in a browser cookie and automatically directs the user to that campus on their next login. In this mode, the campus dropdown is hidden, and a read-only campus tile is displayed to keep the user within the correct campus.
You can edit a template by selecting the ![]() icon located under the Actions column in the grid. This will allow you to make changes to the campus details.
icon located under the Actions column in the grid. This will allow you to make changes to the campus details.
IMPORTANT - If your site licence allows up to five campuses and only three have been created, you can add a new campus using the +Campus button. If you have already set up 5 campuses in the system, you will not see the +campus button on the welcome screen. You are able to add campuses according to your site license.