We are pleased to introduce a new Custom Import feature, designed to offer enhanced flexibility and control over data management within TEAMS. This feature allows users to create and upload a CSV file with custom-defined column headers. Upon uploading the CSV file on the Custom Import screen, users can seamlessly map their CSV column headers to the corresponding TEAMS fields. This functionality enables users to either add new entries or overwrite existing data in TEAMS, ensuring that data imports are tailored to their specific needs.
- Important Note: Currently we only have implemented a few of the custom files that I have listed below:
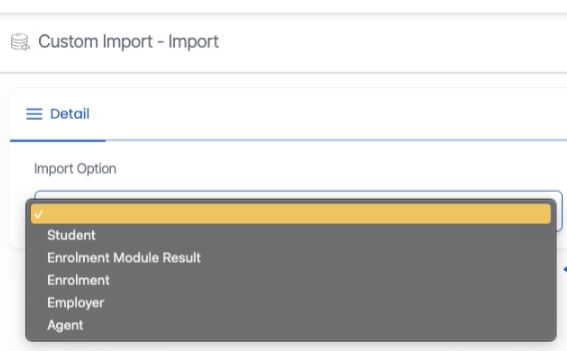
- Student
- Enrolment
- Enrolment Module result
- Employer
- Agent
1. Create a CSV file with data in it
The very first step is that a user needs to create the CSV file that contains all the data that a user wants to newly enter or overwrite into TEAMS.
2. Upload CSV:
To upload the custom import file, a user needs to go to the Admin > Custom Import screen from where a user can choose the Import option for which he/she is going to import the data.
Once you select the import option upload your file by selecting the upload button on the same screen.
3. Field Mapping and saving the structure for future use
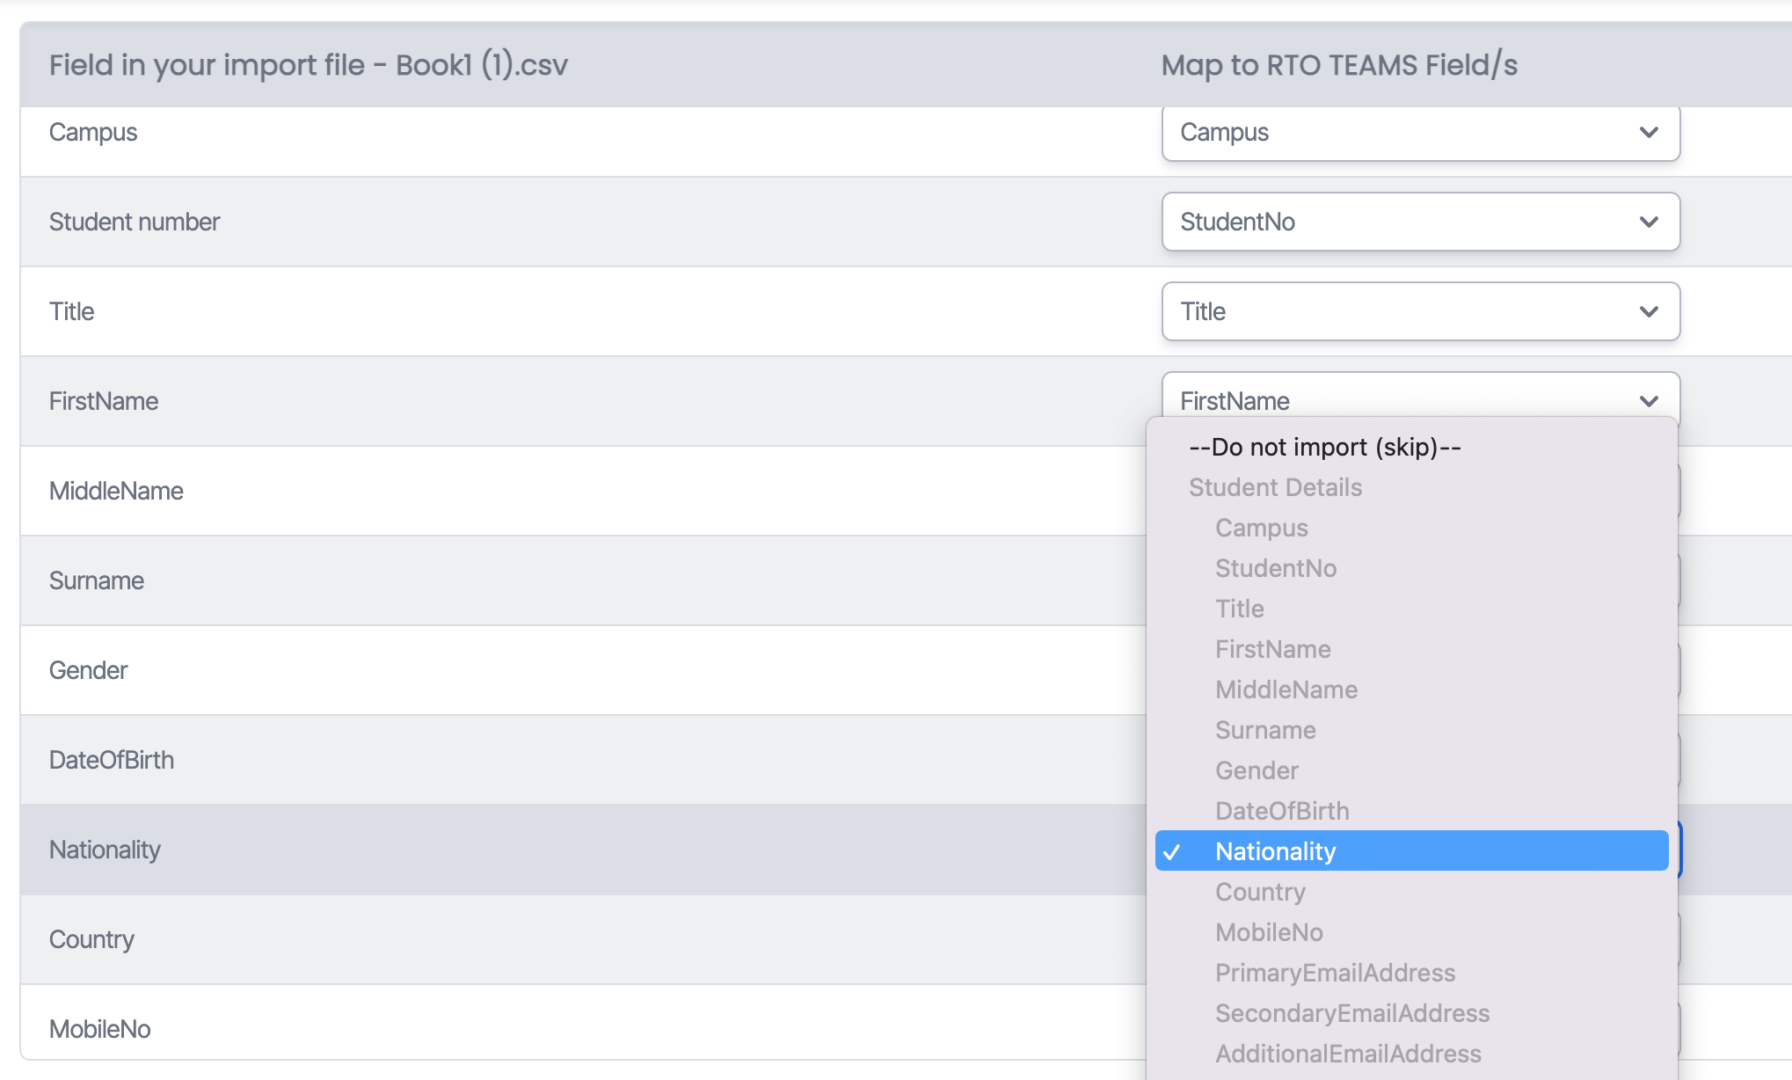
Once you upload the file the system will take you to the Field mapping screen from where you can see the two fields explained below:
- Save this import map for (for later use)
If you are doing this import for the very first time then you have to name your import so that in future, if you are importing the data with the same column header the system will eliminate the fields mapping step for you.
After naming your file you need to map the CSV file header with the TEAMS fields so that the data will get updated/overwritten into the correct fields, as shown in the below screenshot:
- Pick from an existing import map
This is a dropdown that shows all the previously saved import maps. After uploading the file if you choose the already existing import map from the dropdown the system will automatically map your CSV column headers with TEAMS fields.
Once you enter the file name or select the existing import mapping click on the Next.
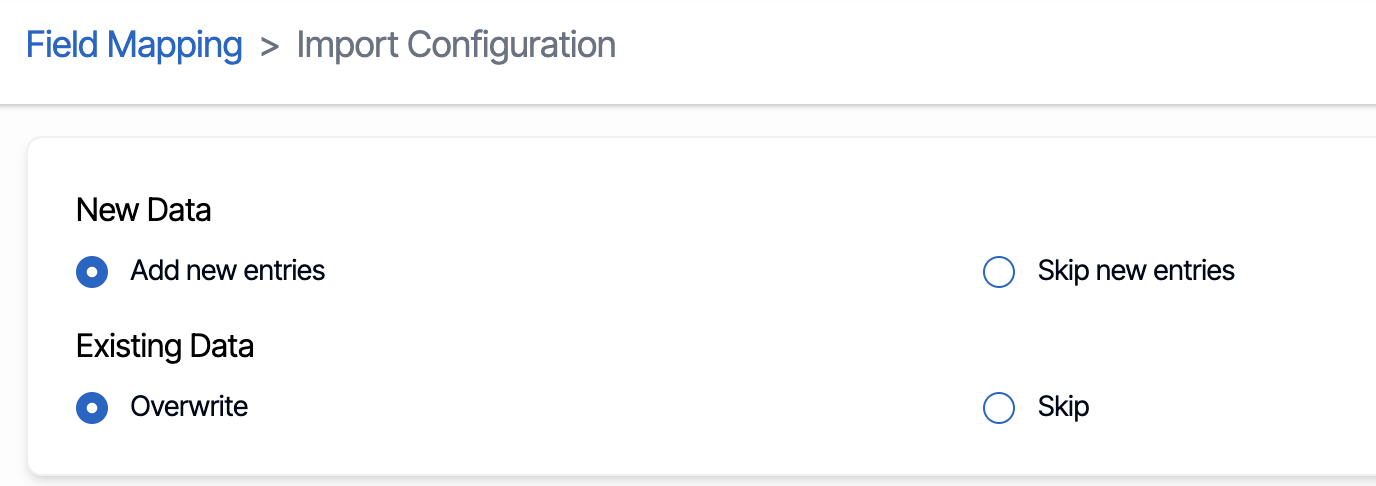
4. Import Configuration
In this step, the system will ask you 2 more new options, which I have listed below:
New data: If the system found any new data in the uploaded CSV how do you want the system to proceed with it, if you want to get an update to enter into TEAMS then you can choose the Add new entries radio button or if you do not want the new data to be updated into TEAMS then you can choose the Skip new entries radio button.
Existing data: There are further two radio buttons that will allow you to overwrite the existing data if you have selected the overwrite radio button skip will skip and will not overwrite the new data on the existing data.
After doing the required selection of the radio buttons, please click on the submit button to finalise the import and the system will take you to the custom import Dashboard, from where you can see the data is getting imported into TEAMS (under processing) and after the it will show imported once it is imported.
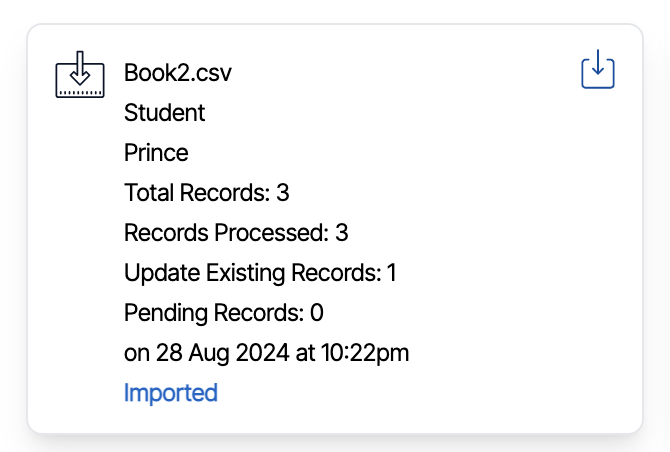
- Total record will show the total count of the records from your uploaded file.
- Records processed will show how many records the system has processed.
- Update existing records will show how many records have been overwritten.
- Pending records will only show you how many records are pending to import
Once its successfully imported or there is an error click on the download icon to download the files to find out the error or successfully imported data.