Enrolment dashboard > Financial tile > Add/Update OSHC
The Enrolment Dashboard features a Financial tile that provides functionality related to linking a Healthcare Provider. By accessing the Financial tile, you can link a Healthcare provider from the Students tab to the enrolment.
Steps to link the OSHC
Go to the Enrolment Dashboard > Financial Tile > Student Tab
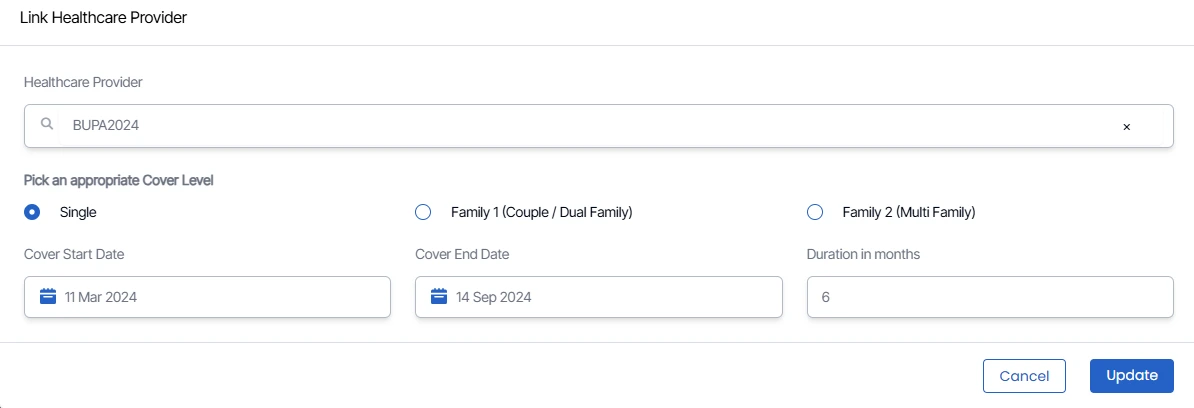
- Next, open the student tab and select the burger menu, then click on Add/Update OSHC. A pop-up window will appear.
- Next, fill in the necessary information in the specified field.
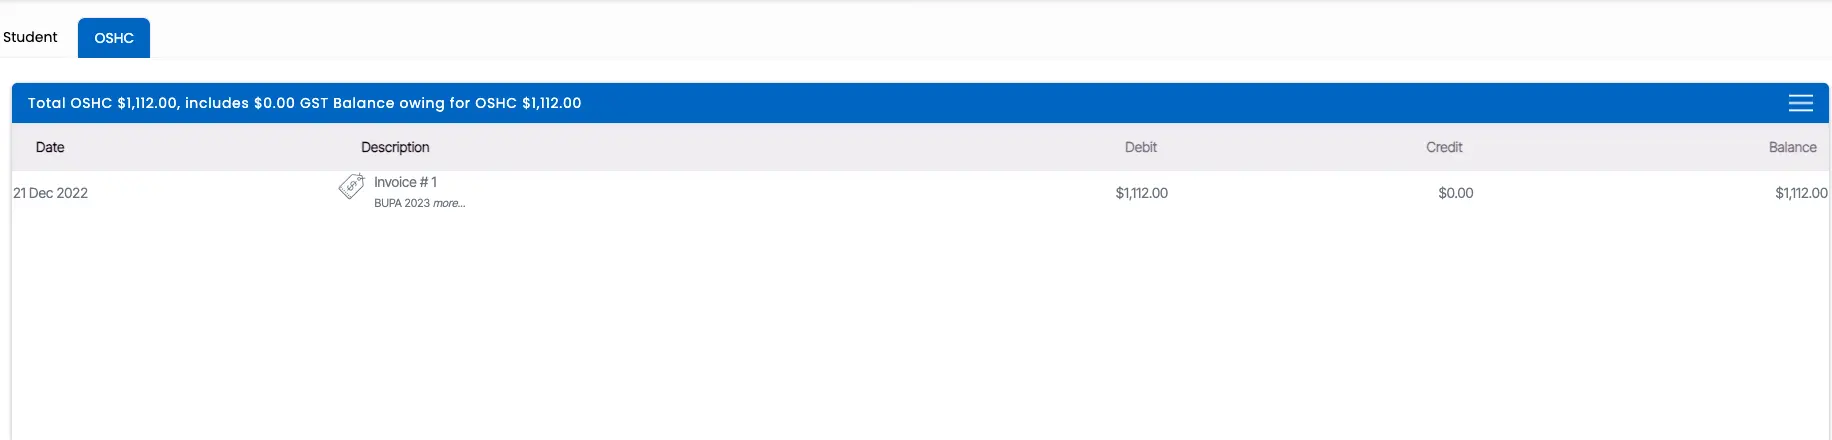
- After entering the data in the fields, click the “Update” button to save the changes. The system will reload the enrolment dashboard and will show the OSHC tab under which the linked OSHC details with invoices are shown.
Financial Tile Burger menu on OSHC Tab
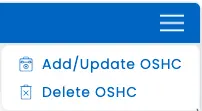
Add/Update OSHC
After clicking the Add/Update OSHC icon, you’ll see the same pop-up screen for the Link Healthcare provider. Follow the same procedure as you did when adding details.
Delete OSHC
Once you select the delete icon, the system will show you the pop-up message on top of the screen. (Are you sure you want to delete the healthcare provider from the enrolment?). You can select OK to delete or cancel to leave it as it is.