Admin > User
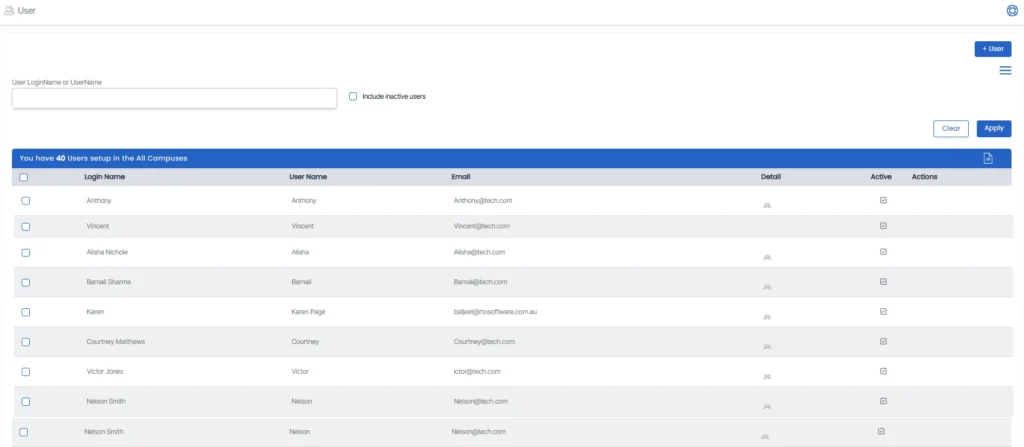
The User Screen allows you to efficiently view, manage, and create user accounts in TEAMS. You can search for existing users, include inactive ones, perform bulk actions, and add new users all from one location.
To find a user, enter their Login Name or Username in the search field.
Tick the Include Inactive Users checkbox to display inactive users alongside active ones.
You can also perform bulk actions by selecting multiple user records and using the burger menu (⋮) to choose from available options such as Send Email or Send SMS.
Please Note- Action icons appear only if your role has the required permissions.
To add a new user, click the +User button in the top-right corner. This opens the User Entry Screen, where you can enter details and configure the new account.
User Entry Screen
The User Entry Screen is divided into several tabs that allow you to enter and manage user information in an organised way.
- Details Tab – Enter the user’s Login Name, Username, Password, Phone Number, and Email Address.
- Contact Tab – Add Phone Number and Email. Tick Send Email to All Available Addresses to send messages to all listed addresses.
- Address Tab – Enter local and mailing address details. Tick Copy Address if both are the same.
- Next of Kin Tab – Record Name, Relationship, Phone Number, and Email for the user’s emergency contact.
- Higher Education Tab – Add educational details if required.
Once all information is entered, click SAVE.
Roles and Permissions
After saving, the Roles and Permissions screen will appear.Here, you can assign user roles and permissions as required.
A burger menu in the top-right corner provides options such as:
- Add Permissions
- Remove Permissions
- Select IP Range
- Manage Documents
- Communication Options
The same menu is also available at the bottom-right corner of the Roles and Permissions Value Screen for quick access.
Icons – Click here to learn more about how to use these icons.