Main Dashboard > WhatsApp Business Integration
The WhatsApp Business Integration in TEAMS allows you to send messages to students directly from your business WhatsApp number. This means you no longer need to switch between platforms, and every conversation is stored in TEAMS for easy tracking and reference.
In this integration, you’ll find the following features:
- Direct Messaging – From the Student Dashboard, go to the Profile tab. Next to the student’s phone number, you will see a WhatsApp icon. Clicking this icon opens a chat window, allowing you to message the student directly.
- Template Messages – WhatsApp requires that the first message you send to a student must be a template message.
- Once the student replies, you can continue the conversation for free for the next 24 hours.
- Normal WhatsApp messages cannot be sent until the student responds to your initial template message.
- Creating Templates – To set up a new template, go to Create Template > New Template. Enter the relevant details such as:
- Template Name
- Type (Utility, Marketing, or Transactional)
- Language
- Header, Body Text, and Footer
- Quick Reply Button (optional)
- After submission, the template must be approved by WhatsApp. You can check its status in the templates list.
- Attachments – You can share files directly in the chat. To do this, click the attachment icon next to the emoji symbol, choose your file, and send it. Please note the maximum file size is 20 MB.
- Cost and Requirements – Each template message costs $0.745 to send. To enable this integration, you must have both an active WhatsApp Business Account and a registered Meta developer account.
Setting Up WhatsApp Business with Meta
To connect WhatsApp Business to TEAMS, follow these steps:
- Create a Meta Developer Account by visiting Meta Developer Registration and follow the account creation instructions. Once done, log in to your account.
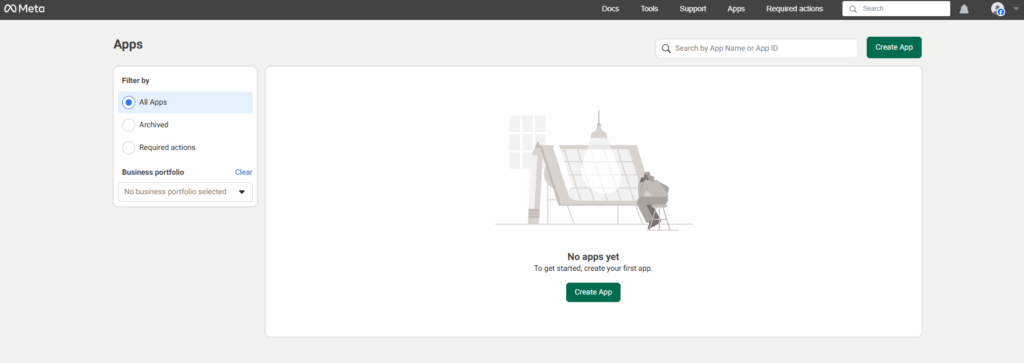
- Create a new App in Meta Developer Console – after logging in, you will see the Create App button on the home page. Click on it to start creating your app.
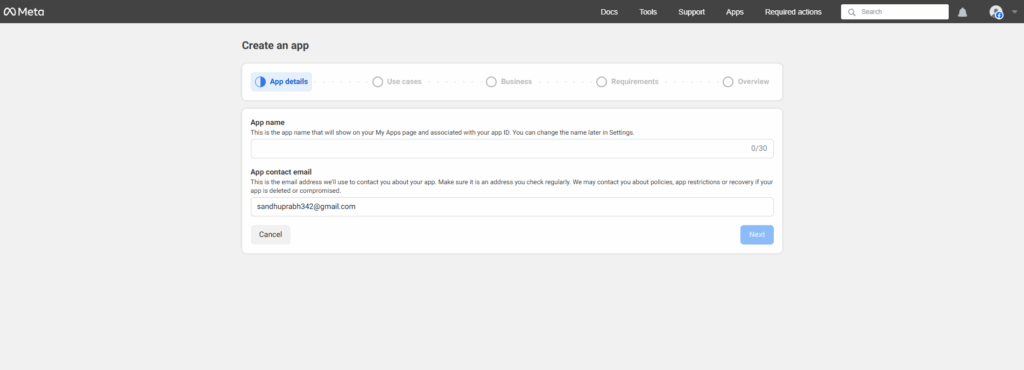
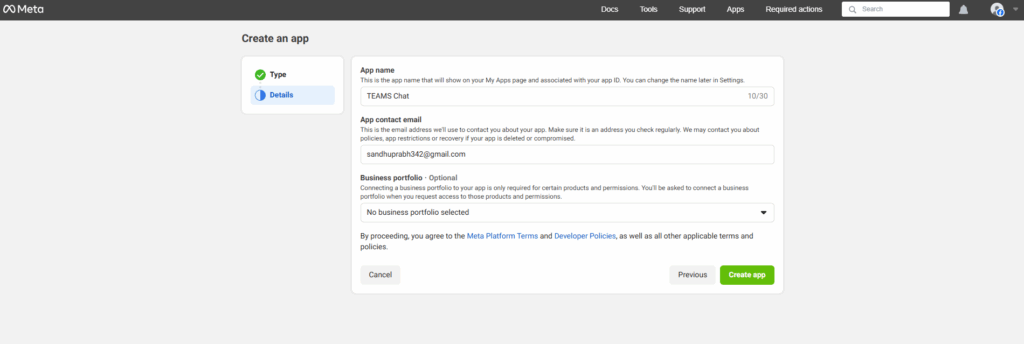
- After selecting Create App, you will be redirected to a new page:
. Enter your App Name and Business Email, then proceed with Next.
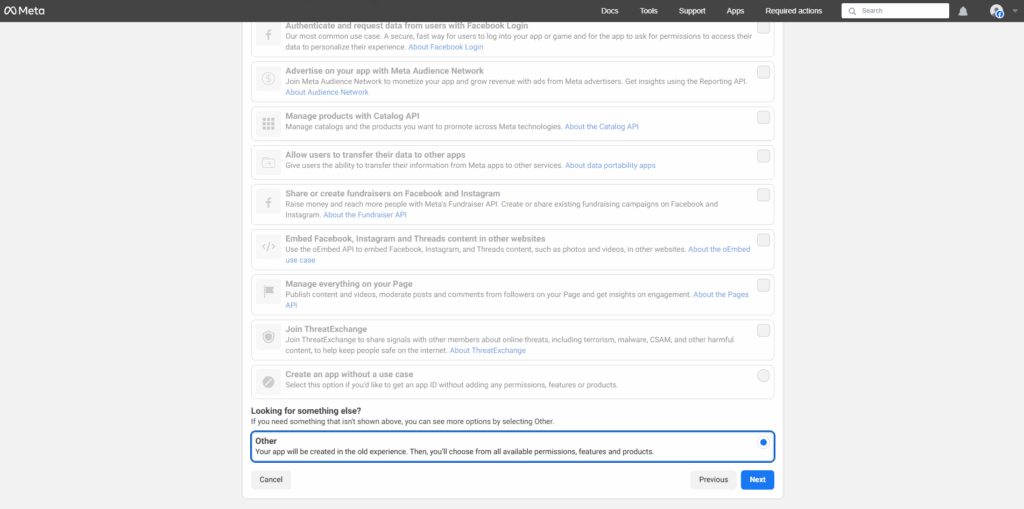
. Under Use Cases, choose Other.
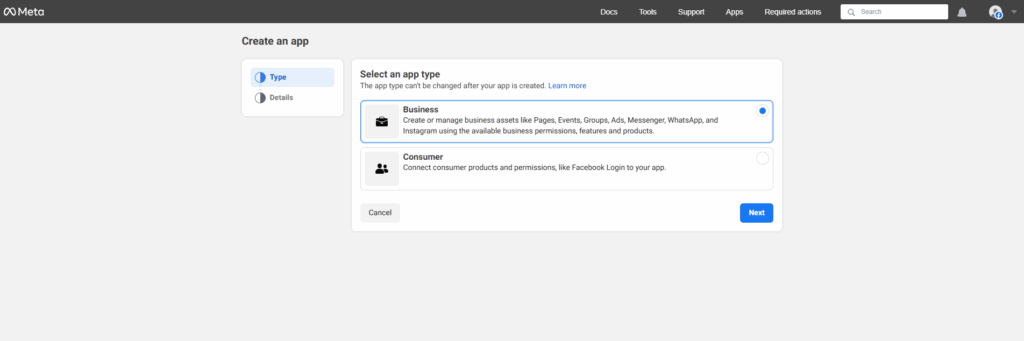
. On the following page, select Business as the app type and continue
. In the details section, review the information and confirm by selecting Create App.
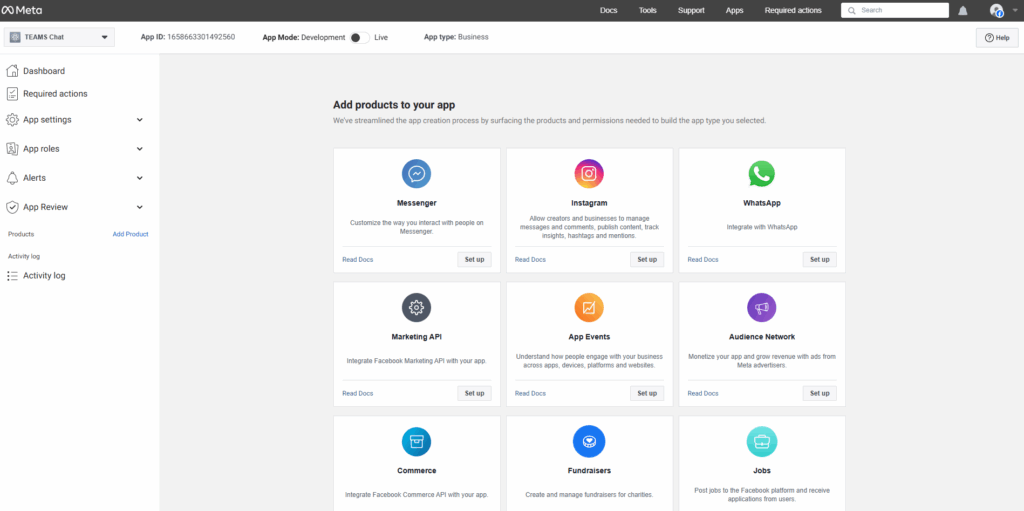
- Once your app is successfully created, you will be redirected to the Add Products to Your App page; under WhatsApp, select the Set Up button to continue.
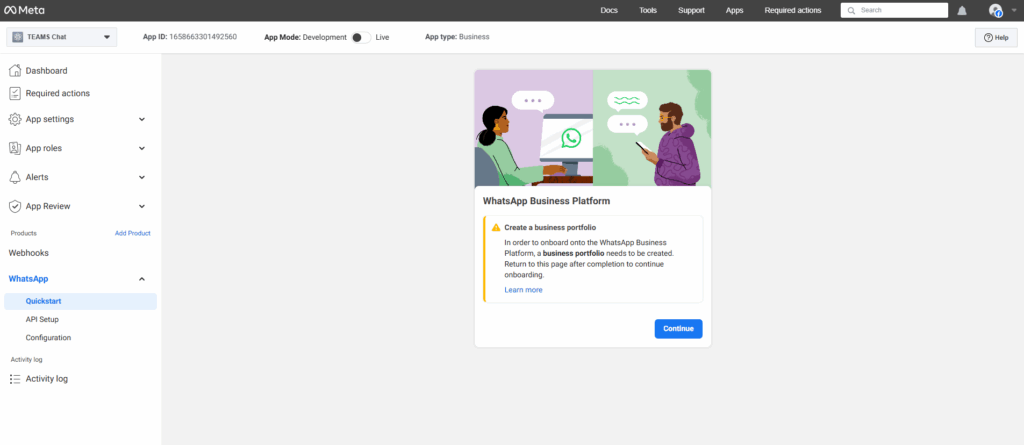
- After selecting Set Up, you will be redirected to the WhatsApp Business Platform page. To onboard, you must first create a Business Portfolio by adding your business email and verifying your account — select Continue to complete the process, and once it is successfully created you will be redirected to your Portfolio Dashboard.
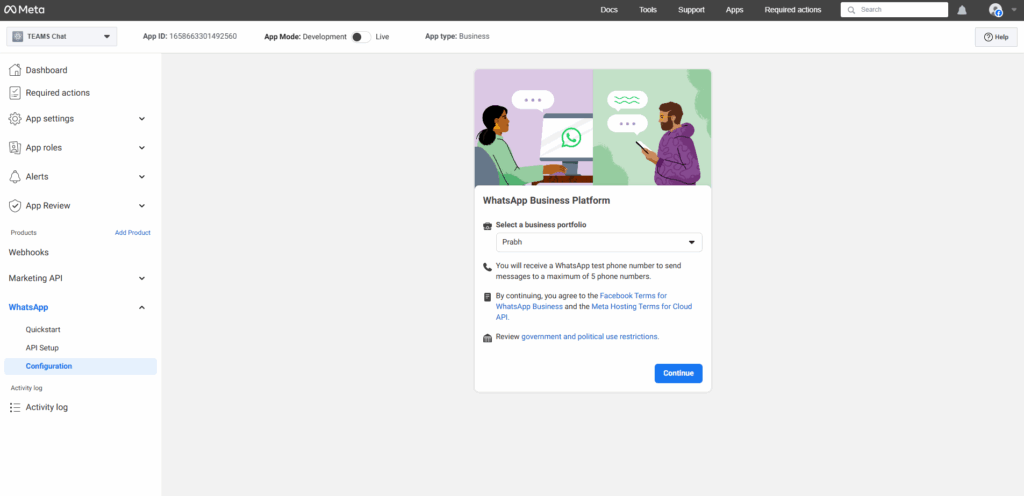
- Return to your Meta Developer Account, open the dropdown menu, and select the Business Portfolio profile you just created, then proceed with Continue.
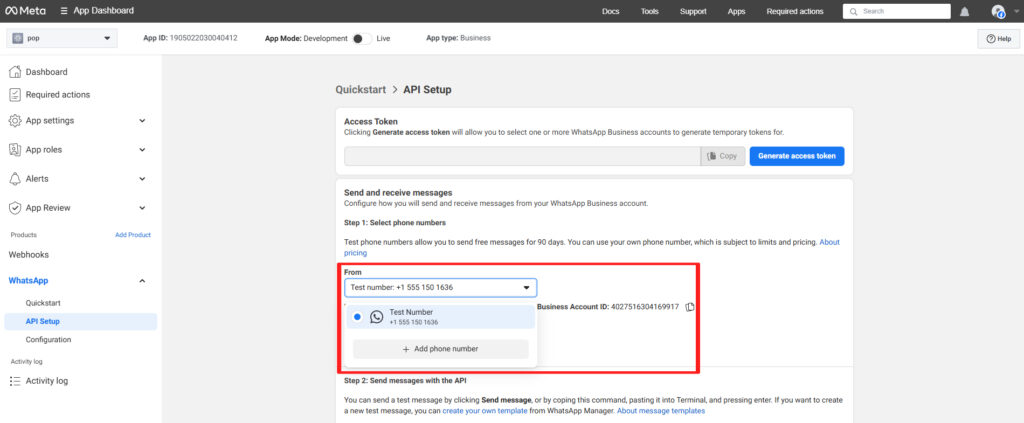
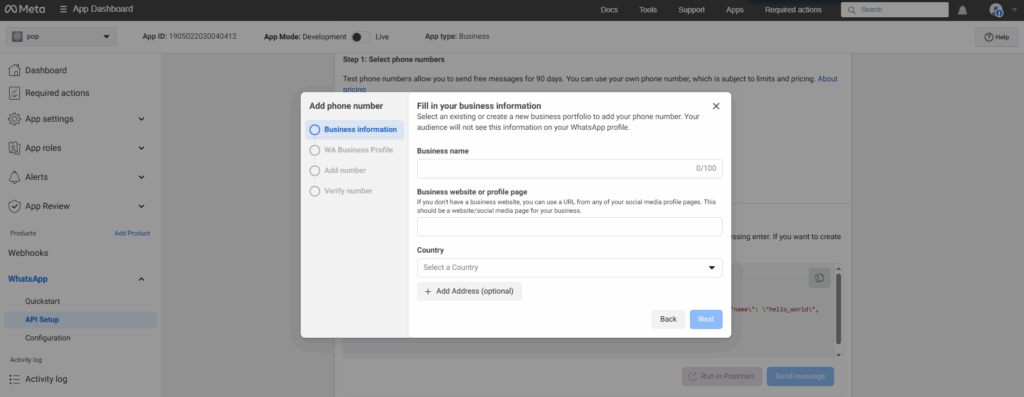
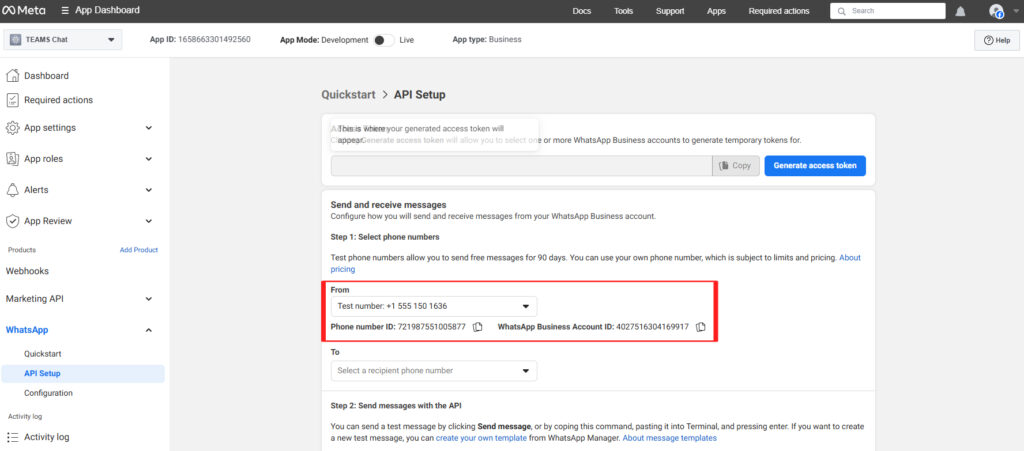
- Once your portfolio is connected, go to API Setup from the WhatsApp menu in the sidebar. Under the phone number dropdown, select Add Phone Number. A popup will appear where you can enter your business details, add your WhatsApp Business number, and verify it.
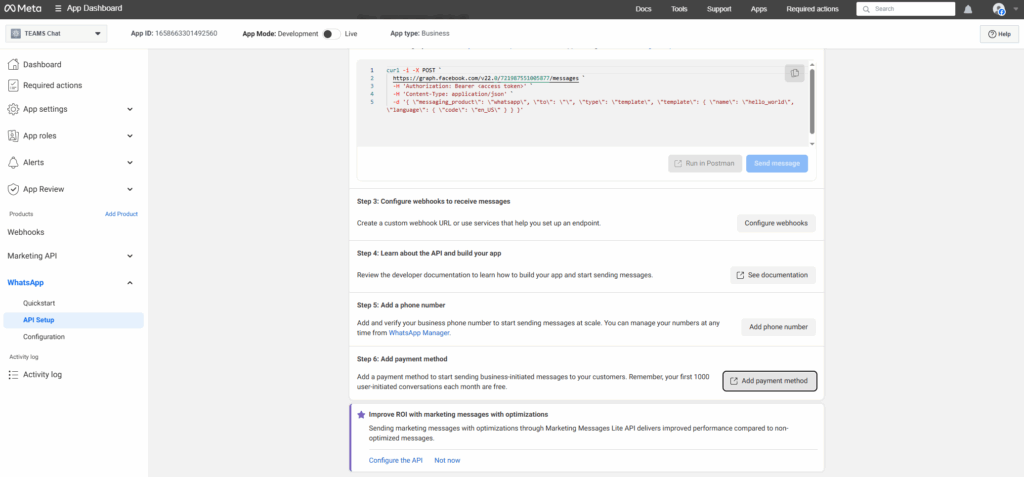
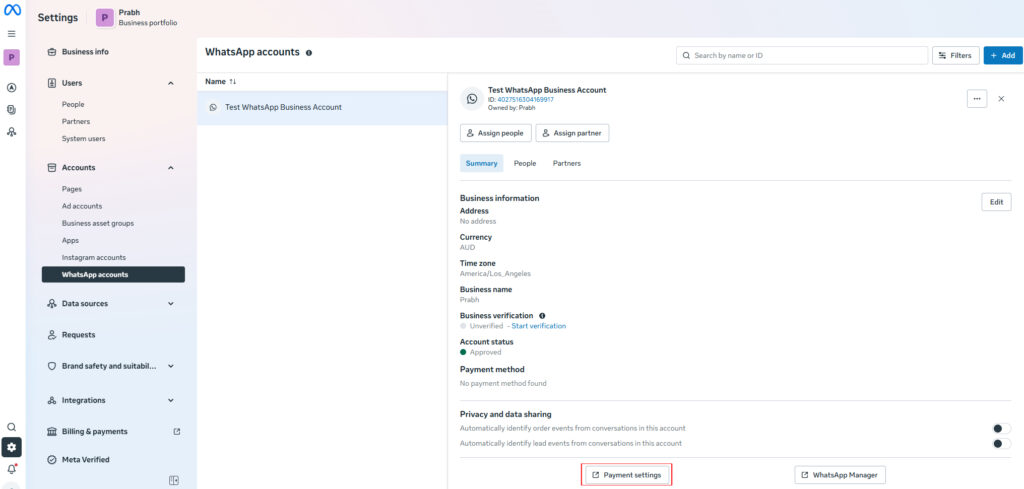
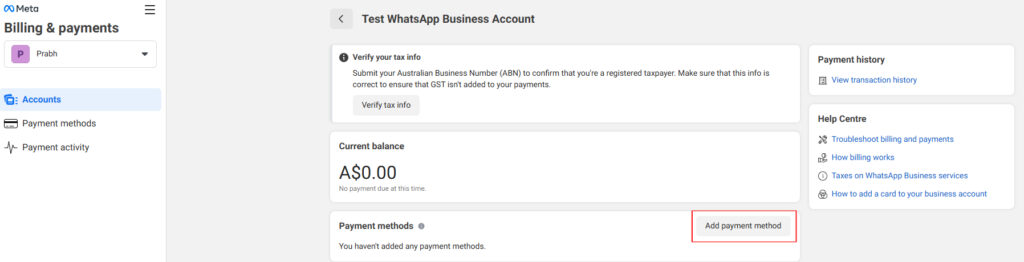
- To set up payments, select Add Payment Method. You will be redirected to a Business Portfolio WhatsApp accounts page — choose Payment Settings, then select Add Payment Method. A popup will appear where you need to:
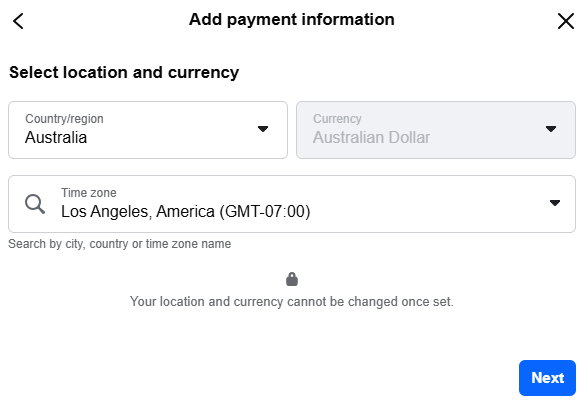
- Select your region and timezone, then proceed with Next.
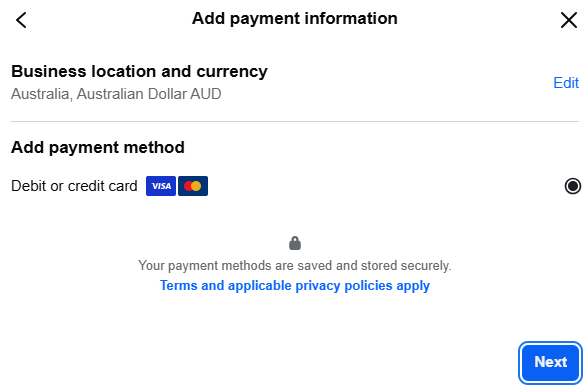
- Choose your payment method and continue with Next.
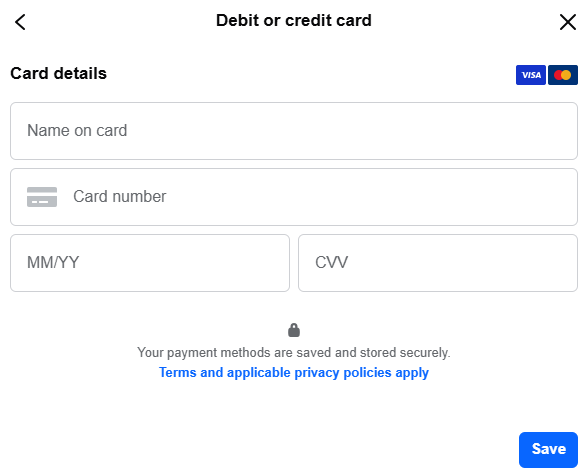
- Enter your billing details and save.
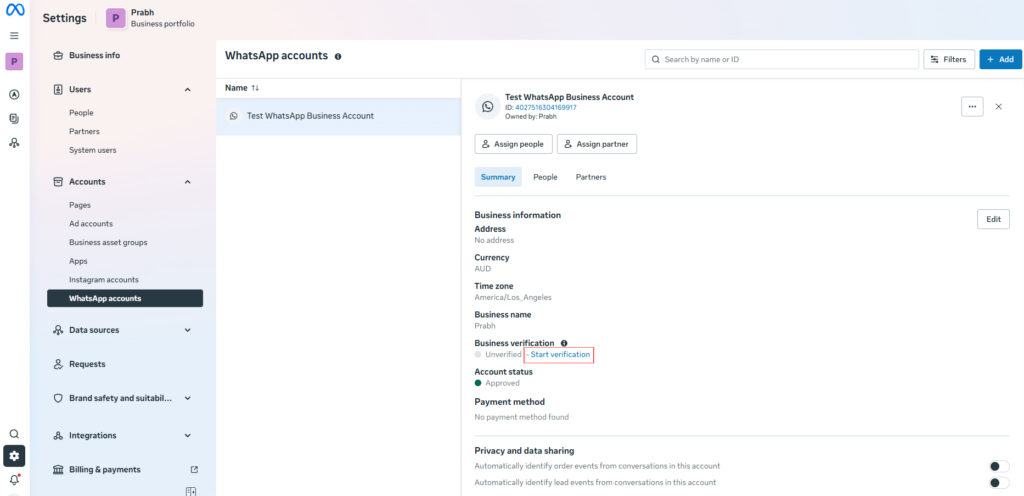
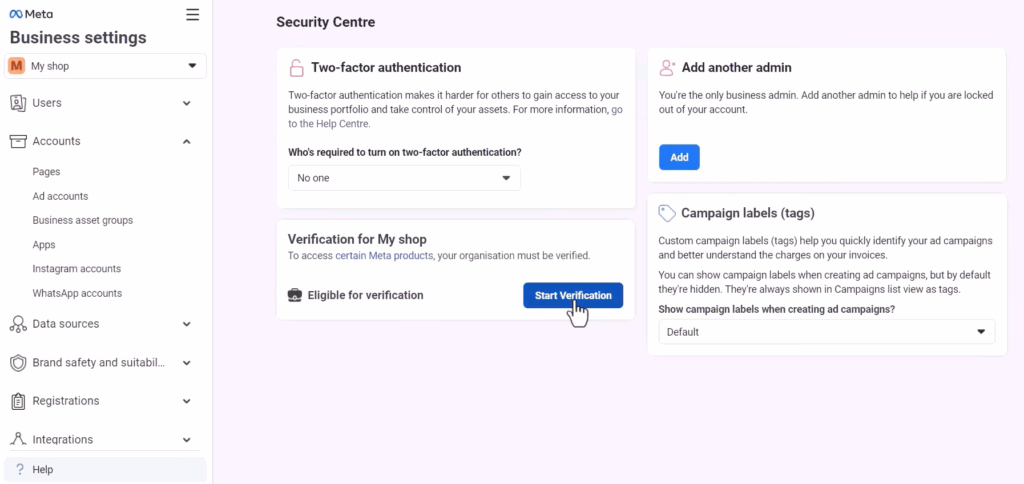
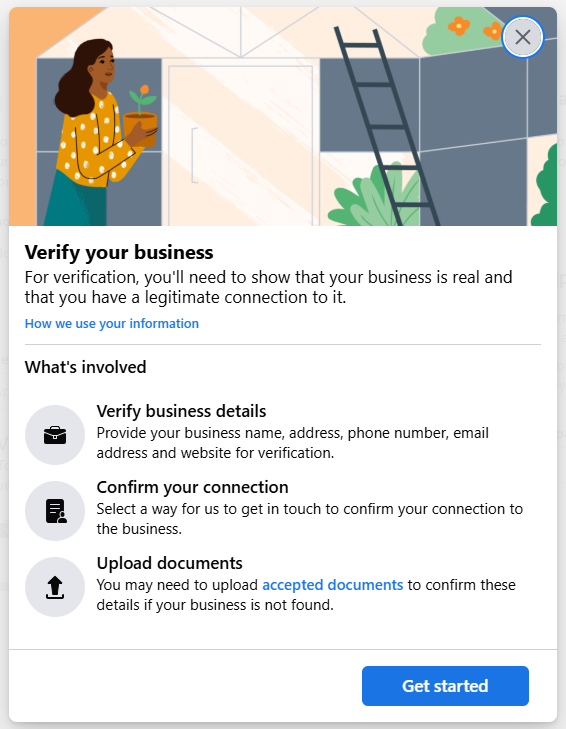
- Next, verify your business. Select the Start Verification button to open a new screen, then select Start Verification again. A popup will appear — follow the on-screen instructions to complete your business verification.
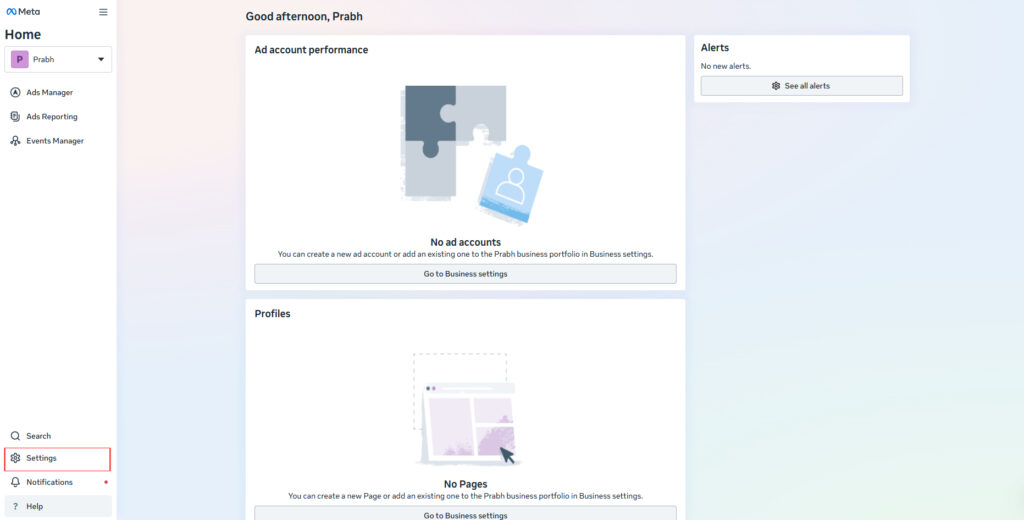
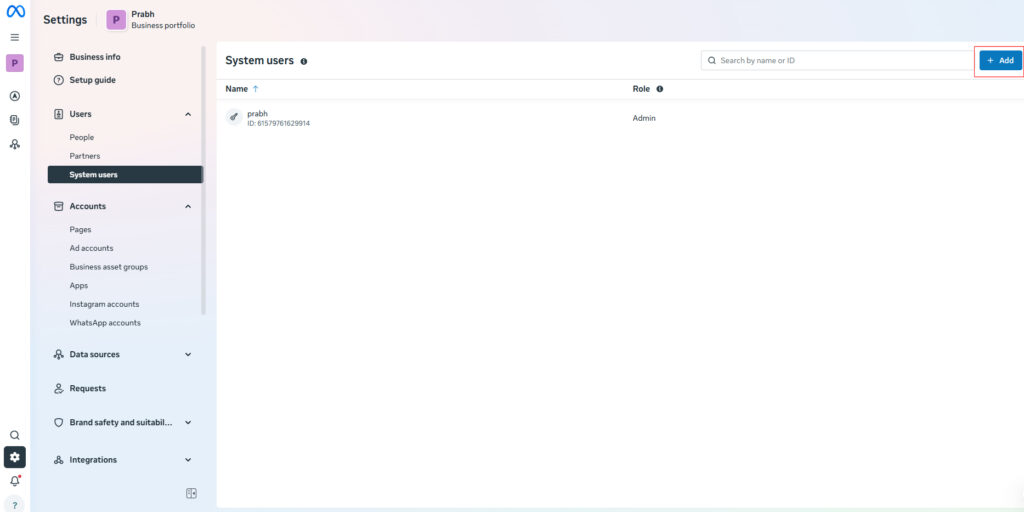
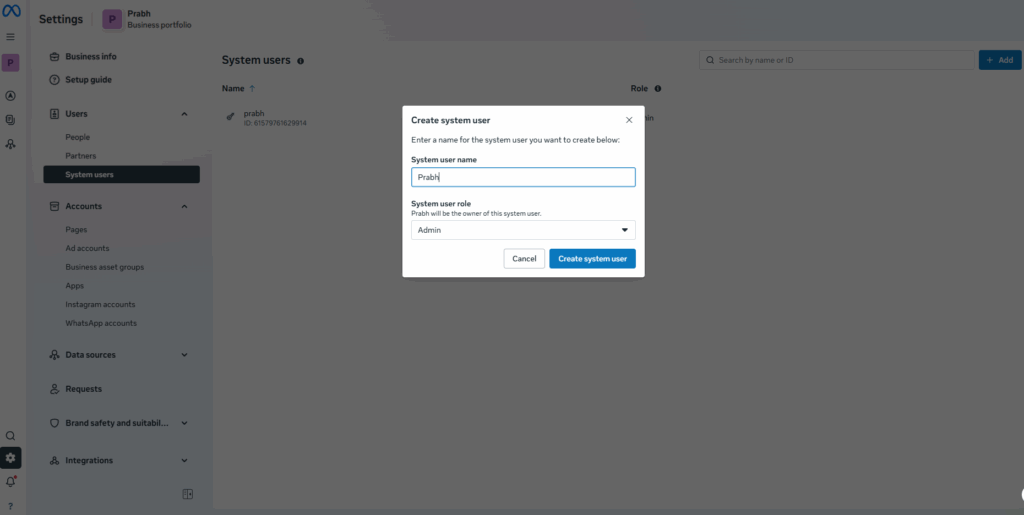
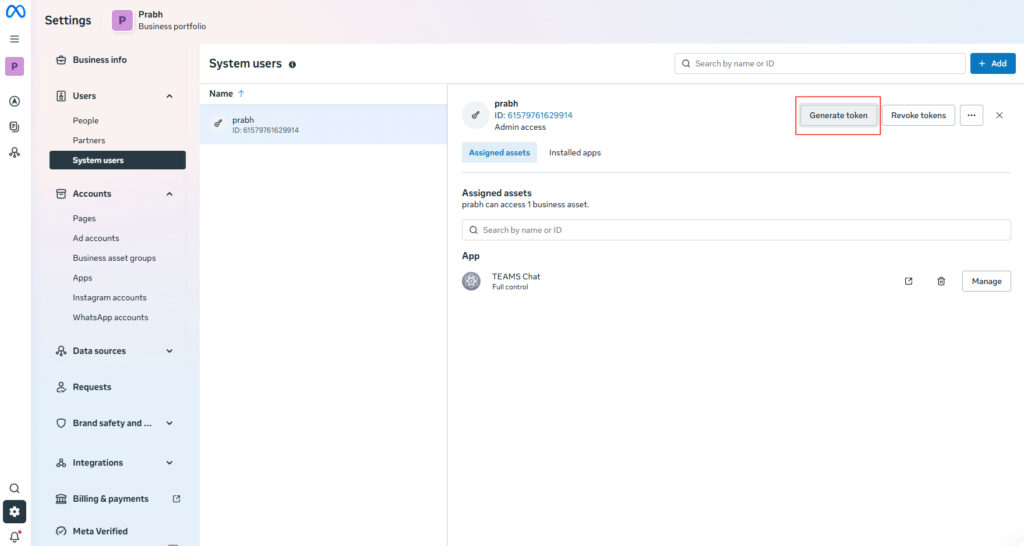
- After verification, you need to generate a permanent access token. To generate one, access your Business Portfolio by using this link, then go to Settings > System Users from the sidebar. Click on + Add button, a popup will appear here enter a name, set the user role to Admin, and confirm by selecting Create System User.
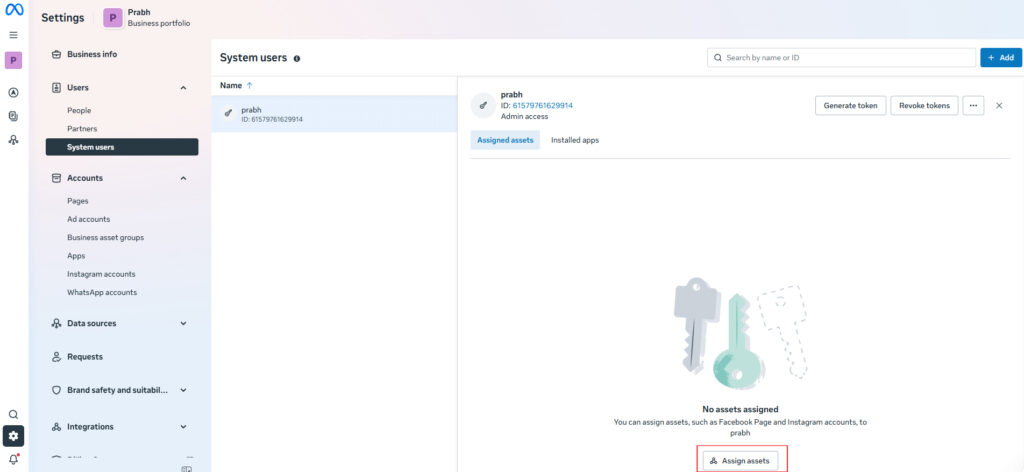
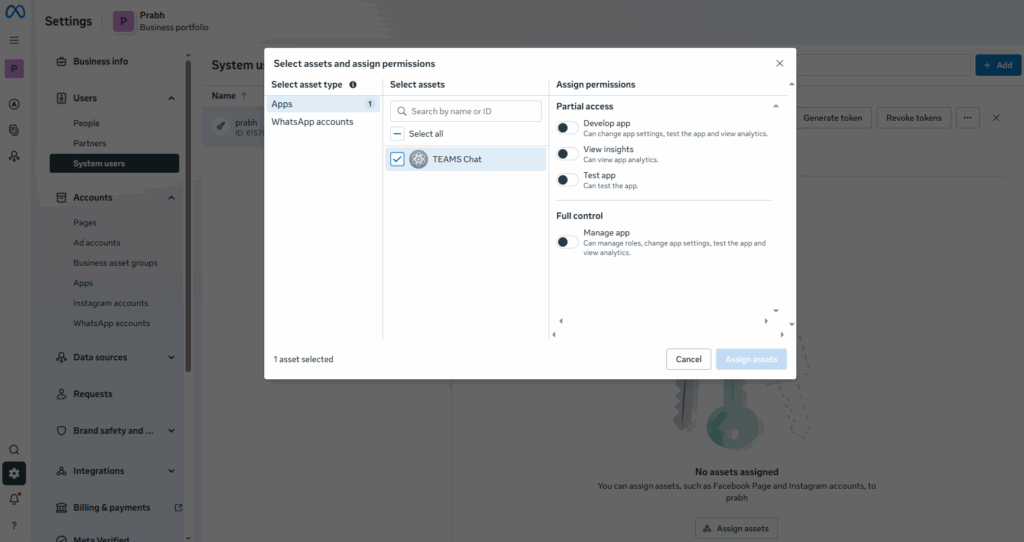
- After the System User is created, click on Assign Assets button. A popup will appear — choose the app you created, grant it Full Control, then confirm by selecting Assign Assets to save.
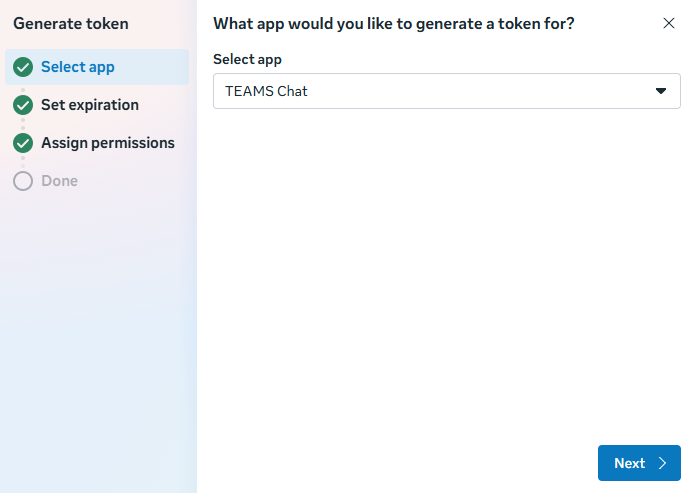
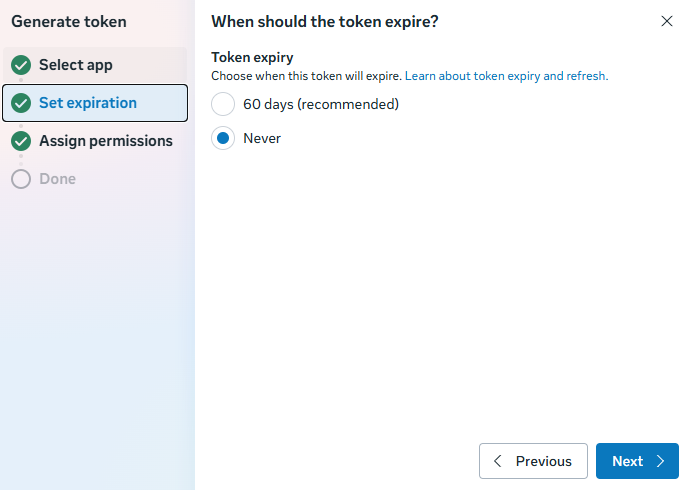
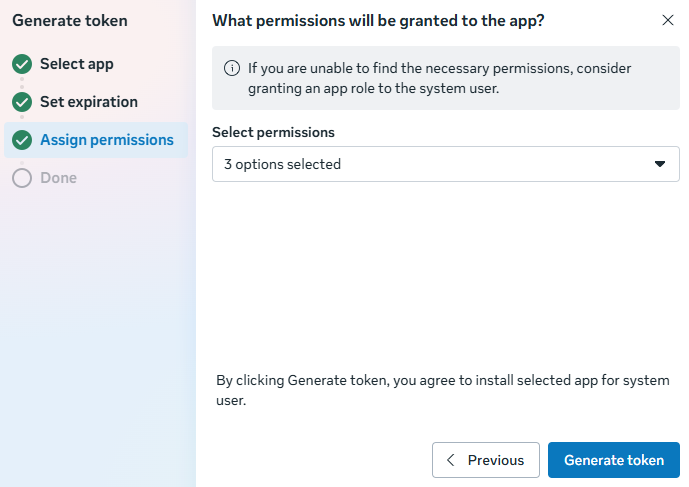
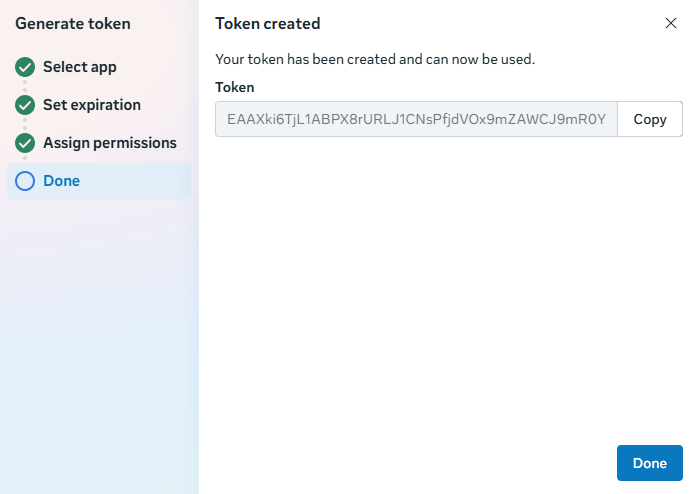
- Next, select Generate Token. A popup will appear — choose your app and proceed with Next. Set the expiry date, then continue. From the permissions dropdown, enable:
whatsapp_business_manage_eventswhatsapp_business_managementwhatsapp_business_messaging
- After this, select Generate Token. Once your token is generated, copy and save it securely as you will need it later, then finish by selecting Done.
- Share integration details with Support (email or call):
- After your account is set up, share the below details with Support via email or call:
- Phone Number ID
- WhatsApp Business Account ID
- Access Token (the permanent token you generated)
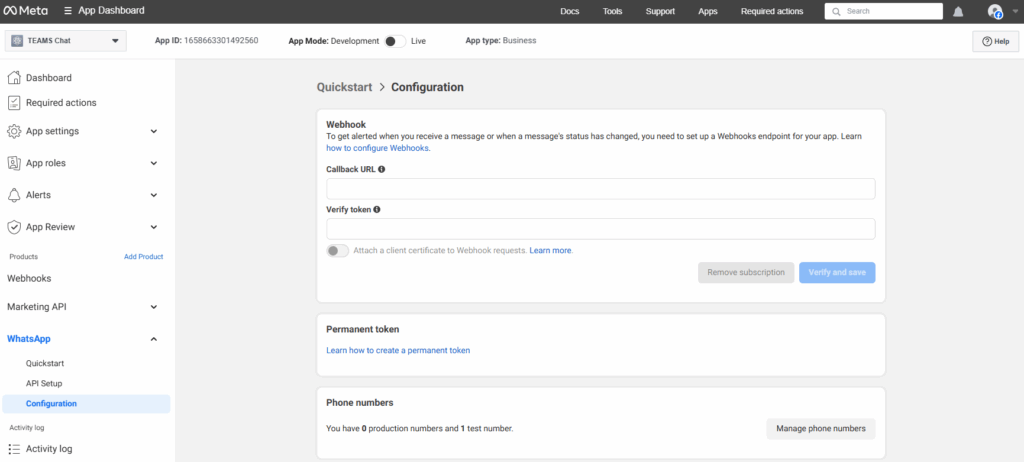
- Verify Token (you can choose any value, or we can provide one)
Where to find the IDs: Meta Developer Account > WhatsApp > API Setup in the sidebar.
- After these details are shared with us, we will provide you an API URL. Add this in the Callback URL field on the Configuration screen (open from the sidebar under WhatsApp > Configuration). Along with the Callback URL, enter your Verify Token, then click on Verify and Save.
This integration is especially useful for admin and support teams, as it speeds up communication, keeps all records centralised, and reduces the need to use multiple tools. Instead of searching through different platforms, you can manage and review all student WhatsApp conversations directly within TEAMS.